
By Samantha Wyant | HDLS Manager
Sorry for the delay, but we’re finally back to finish our three-part series exploring 360° photos, cameras, and technology and how you can use them to your advantage. In Volume 1, we discussed the difference between still and 360° images, learned how 360° cameras work, explored some hardware options, and listed some construction specific applications for the technology. The next week, in Volume 2, we investigated the applications for 360° photo and video and discussed ways to view and share photos using your existing and/or free software. For our final installment, Volume 3, we will explore different software and apps that are currently available and discuss their uses, strengths and weaknesses, and cost-effectiveness.
The tools available vary greatly in functionality and target market, so it is important to realize what your goals are for using the software before you decide to purchase. For this post, we will focus on three different software applications that we have had the most experience with, but this is by no means an exhaustive list.
Cupix
A popular application for 360° photos currently is 3D virtual tours or walk-throughs. Cupix is one of the first software packages I had experience with that focuses on this implementation primarily for real estate and construction site documentation. It is currently available in a free Beta version, but will most likely start charging for services in the near future.
The workflow for using Cupix is as follows: shoot photos, upload to the editor, customize your 3D virtual tour, and share your tour with others. Cupix boasts the ability to automatically place 360° photos and compute 3D geometry for the space. I have been mostly unsuccessful getting this function to work correctly and the process is time consuming. Cupix recommends taking photos on a 6’ spaced grid for open spaces, 4’ apart for hallways, and 3 photos 2’ apart through a doorway. For a large space or a complicated geometry, this is a very time consuming process (check out their article on how to take 360° photos for a successful Cupix tour). If taking these photos for a 3D virtual tour, a tripod should be used to ensure that the photographer is not present in the images. This additional step adds even more time to the process.

Cupix Photo Positioning Guide
Once your photos are taken, it is time to upload them to the web editor. A file started from scratch with 34 photos took about 25 minutes to load and for Cupix to automatically stitch together. The program was able to stitch together some of my photos and group them together accordingly, however, I had to edit the locations of the groupings so that they were placed correctly relative to one another. I found the process for placing grouped areas and photos not quite intuitive, but after a little practice it’s easy enough to pick up. This can be time-consuming process, but the ability to upload floor plans of your area does make it easier to understand where and how your photo groupings should be placed and linked together to create the virtual tour. When used on a different, smaller project with more open space the automatic stitching worked much better and, when it works, it is very time saving and efficient.
If you are interested in creating a 3D tour, you are better off taking more photos than you think you need to make the automatic placement and 3D geometry work better. Also, it is helpful to make sure that the space you are photographing is empty/clean. I found that taking photos on an active construction site made the photos less likely to automatically come together. This could be due to an error on the photographers part rather than my assumption that moving people/equipment/etc confused the software.
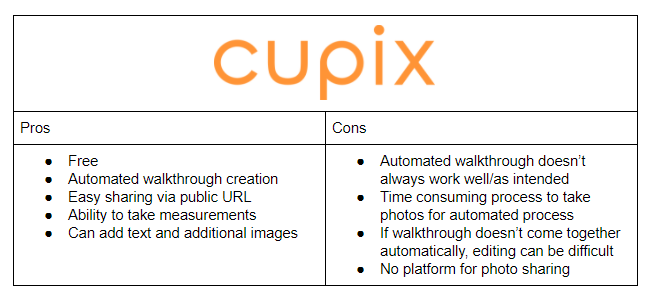
The final 3D walkthrough produced by Cupix is impressive and a definite ‘eye-catcher’. The final product is customizable giving the user the ability to add text, pins, and other imported photos. The walkthroughs are easy to share or link to a website with a public URL, and the images can even be used to take measurements. As explained, however, the process of getting there can be time consuming for multiple reasons, so if you’re looking for a quick deliverable this may not be the way to go.
StructionSite
StructionSite is geared directly towards construction applications, specifically progress reporting, jobsite documentation, and task tracking. Allowing for the use of both standard and 360° photo as well as video, StructionSite uses an uploaded floor plan to document your construction site and can be shared either using their web interface or through a PDF. The user interface and features are easy to learn for the average user, however, we did have trouble with our original project floor plan being oriented incorrectly. Rather than being able to quickly adjust this in the app, we had to upload a completely different floor plan, which wasn’t anything more than a minor annoyance, but still seemed like something we should have been able to do without having to re-upload our floor plan.
StructionSite also offers a free iOS app where you can easily attach standard photos and video, as well as 360° photo and video after connecting to your 360° camera. The app offers their time-lapse and X-Ray features, which seem to be some of the most useful aspects of the application. Unfortunately, the app is only available for iOS, so I was unable to test it on my Android phone. My co-worker, Stephen, was able to test the app and show me how it worked. With some simple and intuitive manipulation, the X-Ray feature was impressive and will prove useful for construction professionals in the field. Allowing for you to ‘look through’ walls, floors, and ceilings that have been finished to see the prior construction and MEP systems hidden behind them is a valuable feature. This is achieved by overlaying current surroundings (finished walls) with the photos taken of the interior wall construction prior to the finished walls being put into place. Those of you who are interested in seeing how AR technologies will one day impact the construction workflow, this provides a nice peek into the future. The time-lapse function is also accessible from the web platform and will show several photos/pictures from the same location in sequence or side-by-side allowing for easy progress reports and task tracking. The time-lapse feature can also be used with 3D models to show progress photos side by side with the 3D model.

StructionSite Timelapse Comparison
Another useful feature of StructionSite is the ability to share specific photos with colleagues via direct link. You can easily add notes to photos, maybe things like “duct installed too high” or “this pipe to be demolished” and then send a link to that photo to the construction manager or superintendent on site. Similarly, photos can be tagged with keywords and be filtered so photos can easily be found by area, date, issues, trades, or whatever other tags you decide to use.
If you want to try StructionSite for yourself they have a free 21 day trial you can sign up for on their website. Just make sure you have a project in mind, because those 21 days can pass by very quickly! If you decide to purchase the software, an individual account (which does not include the above tagging functionality or the ability for multiple people to work on your project) will run you $40/month or $384/year. If you’re interested in their “Project Team” or “Company” subscriptions with additional functionality you’ll have to reach out to them directly for pricing. Check out StructionSite’s subscription options on their website.

HoloBuilder
HoloBuilder is geared specifically towards construction applications including site documentation and progress tracking. Specifically for 360° photos (no video or traditional still images), HoloBuilder uses an uploaded floor plan to document your work site. With several options for uploading floor plans, HoloBuilder is one of the easiest apps to get started with. You can take a picture of your floor plan directly with the phone app, upload a picture (.jpg or .png) in the web editor, upload a pdf, or upload views directly from Autodesk BIM 360, Autodesk Revit, and Google Maps using their add-ins/integration functions. (We're really excited about creating projects and 360 panoramas directly from Revit and comparing virtual vs reality) When you first upload your floor plan, it is easy to edit, crop, and rotate before saving to the project, however, once this step is complete you are unable to edit the floor plan again so make sure you have it the way you like it before you start adding photos.
There are two ways to add 360° photos to your project - using the web editor or their free phone app, JobWalk. Using the web editor, simply drag and drop the photos you’ve taken into the project and then drag each photo to its location on the floor plan. A “hot spot” will be created showing that there is a picture at that location. It is easy to reposition photos in the web editor if you accidentally put it in the wrong place. With JobWalk, the holoBuilder phone app, you can place photos on your floor plan as you take them in the field. Simply setup your camera and click the location of the photo on your plan and a photo “hot spot” will be created in that location. These photo locations can also be edited using the web editor.
Photos can also be linked together to create a virtual walkthrough of the site using either the web editor or the JobWalk app. To make linking scenes easier, I would suggest naming the photos as you take them in the field so that you can quickly identify the locations of all of your scenes without having to look at the photos. In the app, click on any location in a photo that you’ve taken and you can link another scene (photo) to that location. This creates an arrow pointing to the location of that scene in the project viewer, allowing a user to simply click on that arrow to go to the next linked location. Similarly, a scene can be directly dragged from the photo list in the web editor into another photo to create an arrow linking the two scenes. Or you can drag the “Go to scene” arrow object from the right side of your editor onto your photo and then link a photo with the menu that pops up. Scene arrows can easily be edited, deleted, or changed after they have been added. Unfortunately, linking two photos from one scene does not automatically link them in the other since the photos have no direction assigned to them, meaning that you must link each photo separately from each scene. Be aware that the arrows do not rotate or scale as you manipulate the scene, however, I have been told that this is something that the development team is working on.

Linked Scenes in the HoloBuilder Web Viewer
Similar to adding walkthrough arrows to your photos, you can easily drag and drop other notes and tags into your project. Holobuilder has an extensive list of pre-populated actions and objects, including, but not limited to, buttons for “open webpage”, “show warning”, “show image”, “show PDF”, “play video”, and a multitude of arrows and shapes. Custom objects can also be added, objects can be animated, and you can also add categories to your 360° scenes and floor plans to make finding specific images easier with the filtering tool, making Holobuilder a great tool for documenting issues on your site.
Currently in Beta, Holobuilder also offers a Wall Measurement tool. In order to use it, photos should be taken with a tripod and the room needs to have a flat floor at a single elevation. Walls need to be perpendicular to the floor for the measurement tool to work. Finally, the distance from the center of the camera’s lens to the floor needs to be recorded. If all of these rules have been followed you can easily estimate measurements in a room by using the Wall Measurement Beta and following the on screen directions. Personally, I’m very excited for this feature and hope that Holobuilder continues to develop it and continues in a direction where all photos become more easily measurable.
A final feature I wanted to touch on is the “TimeTravel” comparison. By adding multiple photos to a single “hot spot” on your floor plan, you can compare two different images with each other. This allows for you to compare the same location at two different times throughout the project, making project tracking and reporting easier. It is simple to add TimeTravel photos with both the JobWalk app and the web editor.
Now that your Holobuilder project is created, there are several ways to share. You can send someone a link to view your project through the web app, or you can download your project and send it offline. In order to view offline, you will need to download the HoloViewer Desktop App and you must have an unlimited Collaboration plan. Since pricing is based on square footage of your projects, you may be unable to keep your projects online indefinitely, which makes the Offline HoloViewer essential to saving your projects once the job is complete. You can archive your projects and bring them back at a later date if you need to do more editing, but while projects are archived they’re inaccessible by weblink. With enterprise and individual pricing solutions, you can request a quote online. In the meantime, sign up for a free 21 day trial.
